Well after watching Barrett Jackson auctions recently and seeing all the Camaros with Cowl Induction hoods (ZL2) and having the air cleaner to hood seal on upside down, it prompted me to write up a little instructions page.  Mike Joy did a fine job of giving on-air props to Team Camaro, I can only hope the new owners will see this and correct their seals!
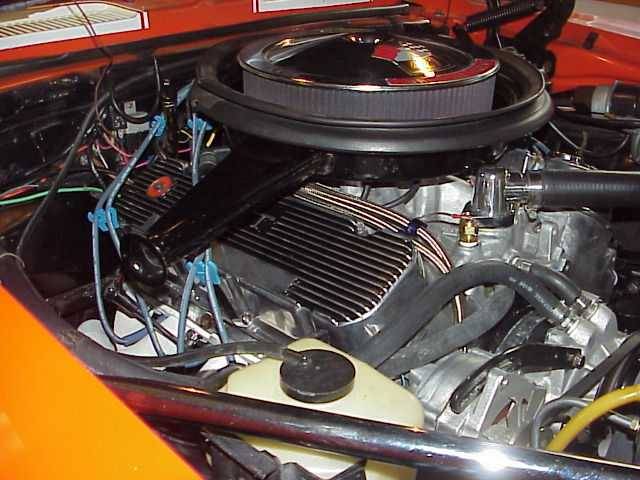
Here we have you basic pic of a repro cowl air cleaner that someone has the seal on upside down (and inside out!). If your seal looks like this… In the words of Tommy Lee Jones “Go home and do it again!”
![Image]()
This next pic is how the seal comes to us from the Parts Warehouse (inside out) and this is where people get confused.
![Image]()
The first thing you need to do is un-stick the mounting lip. For some reason, the seals are manufactured so it looks like the seal doesn’t have the mounting lip, but it does! Find the cloth join and then run you fingers around the seal gently separating the lip from the main seal. You don’t want any tearing!
![Image]()
Next take seal and twist it 180 degrees so that the mounting lip you just separated will be on the bottom and hook over the lip of the seal ring. It helps if you turn the seal and ring over so you are looking at the bottoms of both pieces. Locate the cloth seal joint of the seal and center it in the rear of the seal ring (over distributor) and start working the seal lip over the ring lip.
![Image]()
Keep working the seal lip over the ring lip and around the ring. Make sure what you just put on does not slip off. The seal is a little springy and wants to return to the upside down twist.
![Image]()
After you have mated the seal lip to the ring lip, turn it over and you are done! It should look like this…
![Image]()
Congratulations!!! You have corrected one of the 7 cardinal sins of the 1st gen Camaros. Now when you install your correctly done air cleaner on your engine, reach down and remove that “CAUTION-FAN” sticker by F*RD! 🍻
Mike Joy did a fine job of giving on-air props to Team Camaro, I can only hope the new owners will see this and correct their seals!Here we have you basic pic of a repro cowl air cleaner that someone has the seal on upside down (and inside out!). If your seal looks like this… In the words of Tommy Lee Jones “Go home and do it again!”
This next pic is how the seal comes to us from the Parts Warehouse (inside out) and this is where people get confused.
The first thing you need to do is un-stick the mounting lip. For some reason, the seals are manufactured so it looks like the seal doesn’t have the mounting lip, but it does! Find the cloth join and then run you fingers around the seal gently separating the lip from the main seal. You don’t want any tearing!
Next take seal and twist it 180 degrees so that the mounting lip you just separated will be on the bottom and hook over the lip of the seal ring. It helps if you turn the seal and ring over so you are looking at the bottoms of both pieces. Locate the cloth seal joint of the seal and center it in the rear of the seal ring (over distributor) and start working the seal lip over the ring lip.
Keep working the seal lip over the ring lip and around the ring. Make sure what you just put on does not slip off. The seal is a little springy and wants to return to the upside down twist.
After you have mated the seal lip to the ring lip, turn it over and you are done! It should look like this…
Congratulations!!! You have corrected one of the 7 cardinal sins of the 1st gen Camaros. Now when you install your correctly done air cleaner on your engine, reach down and remove that “CAUTION-FAN” sticker by F*RD! 🍻