Team Camaro Tech banner
21 - 40 of 65 Posts
Discussion starter · #21 ·
So the last couple weeks I have been trying to get the cab finished. I got the trunk pan pretty much done. You may have noticed a few posts back I didn't trial fit the mini-tubs , I just measured the new width of the mini-tubs and copied the old curve with cardboard and moved it over the corresponding amount..you see my template in the old pic below


I really didn't think it would work out , I am not known for my precision ,but it came out pretty dang close


I also have the incorrect floor for a 67 , or wheel tubs maybe? I had a big hole on the drivers side where it meets the tub , something to do with staggerd/non-staggered shocks , so I had to weld in a patch. I also couldn't see how to do a spotweld type joint , so as you can see my my burn trail I fully welded the seamwhere the tub meets the floor.


the weld is hidden by seam sealer anyway


Here is the best trick ever , I read about guys doing this when they build subwoofer boxes and stuff. Just when your body filler is getting stiff , a littler before you would hit with the 40 grit to shape it, take a rag soaked with laquer thinner and just smooth it out. I need a little more practice but one would be able to do stuff in these areas with no sanding once the timing was right


Second try came out better


I got bored of the trunk ,still a few more hours to do in there so I decided to see how my tail panel fits. That kinda snowballed. Its got some of its own stamping problems compared to the Camaro guys issues

1- The bend where it transitions to the weather striping is wrong , the whole thing needed to be bent another 10 degrees or so , this is as high as it would go due to the channels hitting


And this pass quarter is just omfg , the curve is wrong , the contour at the top is wrong. This is going to require many beers to fix


Beer helps .. The solution was to put some plates on the outside of the bumper holes and use a ratchet strap to pull it.

It seems to me rather than pulling into postions and screwing/welding to hold it , it makes more sense to over pull it so that in a relaxed state it is where it should be. At least on something this far out of whack.


I made a few relief cuts .. might have over done it but its starting to fit!!


Being back in another week or two .. the next challenge is going to be getting the contours nice. I am not going for originality , will be happy just to have it symmetric
 
Discussion starter · #24 ·
Hey guys

Been a cpl months rather than weeks since my last post , had a death in the family I had to deal with .. short version , brother in law , 39 ,4 kids ,fellow car guy , cancer ,2 years from having an odd back pain to pushing daisies.RIP brother.

I got the tail panel pretty much roughed in , I was really waiting for my wheels to come in before I commited much more , I tried to fit the fender without the subframe-rad support ,that was a no go they are going to be a big job , so I/ decided to try my hand at smoothing the firewall..

started with a cardboard template


Welded and glued a single piece of metal on


I ended up bodyworking the whole thing


Came out not to bad


Now what I need to do is get the subframe and dif installed so this thing sitting on its wheels ,then I can fit the fenders properly

The good news.. they will fit!!! wheels are 18x12 with 335/30 pilot sports, goodmark mini tubs


Rushforth ratedx 5" backspacing


Know I just to shorten up the rearend , mount the subframe , should only take a cpl hours
 
Discussion starter · #25 ·
4 Day weekend \o/... Going get the car sitting on its wheels and rolling this by Monday.

The rearend worked out better than expected , it needed -3.5 inches exactly on each side. I did some backyard narrowing by cutting it with pipe cutters , then I got the exhaust shop to expand some 2.5 " tubing so it fit tightly into the housing , had to body slam the ends back on .

I didn't have access to a jig or anything fancy , So I die ground out the old carrier just so a piece of pipe would fit nicely into it , and used a dial indicator to check the runout (took me about 3 pieces of pipe to find a straight one).

My plan was to carefully watch the clearance on the pipe running through the housing and adjust my welding as it moved.. lots of googling told me to expect this , but I guess with my exhaust tube inserts hammered in there it wasn't needed??? thing didn't flex a bit , I did 4 good tacks and then welded up each section between them.

TBH I was expecting this to be a complete failure and just buy a moser 12 bolt for it , but it came it so good I am gonna run it.. will just temporary cut and weld the axles to roll it around while I wait for new ones


Discussion starter · #26 ·
And... We have a problem. This is with the weight on the axles. This would be ok if I was making a mod bogger , so I must have fubbed up the 4 link install or I got the wrong coilovers , I want the tire max about an inch below the wheel lip. Time to go back over the ridetech instructions , there a lot of bolt holes in it and not anything clearly stated which goes where so I assume there are for adjustability????


If you see something wrong here shout.

 
Discussion starter · #27 ·
Almost there ... is it just me or does anyone else end up with a garage mess disaster like this after a weekend of thrashing lol. My trusty mig finally self destructed so I had to shuffle my carb budget to a new welder , I think I may have to requisition some more funding. Taking the wifey to Eric Church next weekend so I think that may be a good time to bring it up

 
And... We have a problem. This is with the weight on the axles. This would be ok if I was making a mod bogger , so I must have fubbed up the 4 link install or I got the wrong coilovers , I want the tire max about an inch below the wheel lip. Time to go back over the ridetech instructions , there a lot of bolt holes in it and not anything clearly stated which goes where so I assume there are for adjustability????


If you see something wrong here shout.

Looks like everything is set up correctly. Are you sure that they sent you the right springs? They look too long. I can take a look at mine later today.
 
Discussion starter · #29 ·
Looks like everything is set up correctly. Are you sure that they sent you the right springs? They look too long. I can take a look at mine later today.

No not sure .. Am almost thinking I may have my fronts and rear springs swapped maybe? Can u let me know if your aluminum blocks are flush with the bottom of the bracket like mine? I dropped them down after this photo so the block is bolted to the two bottom holes and hangs below the bracket. Am having front problems now too , the fender is resting on the tire which makes me thinks I may have the springs swapped.
 
Discussion starter · #30 ·
I spent yesterday cleaning up the disaster , then did some figuring on the rear suspension problem .. What I did was by narrowing the diff I moved the pads in by 3.5 inches , this being a second gen diff I ended up with a center to center of 38.5 VS the 1st gen spacing of 42.5 , so 2" per side.

This in turn altered the angle of the coilovers to 19 degrees , and since the shortest distance between 2 points is a straight line , my ride height changed the corresponding amount.

Simple solution , I just moved the mounting brackets down to their lowest possible position. Problem solved

Also made a quick call to ridetech , no problem running with them at this angle and in the lower mounting points , so its good to go. Am very pleased with the back now , the wheel tub clearance is good , they are tucked in enough to miss the quarter lip no problem.


Discussion starter · #31 ·
Hey guys , haven't got much done due to spring stuff...grass,camping etc etc.

Eric Church didn't get me more firebird bucks , but I did get to come home with a new ltz duramax :hurray:


The fender fitment was really bad , I got 235/35 -18 with 10" rims ala 48 hour Camaro , and its more than a tight fit , at -1 degree the bottom of the fenders basically just sat on tire , so that was a bit of a putoff. anyhow got the bug to do some work again , so I dove into modding the fenders so there are no issues with tire rub

Step one was to cut the fender , pull it out and weld in a strip. This brought the top lip out about 1.5"

Still some issues


Searched out some hi-res photos of the 48 hour Camaro , looks like they cut lip of the fender , so off it came


I hammer and dollied the little bit left back around,here is a shot from the inside.


here is the modified lip now , not even noticeably


Fully travelled and turned , I can live with this


Door gap need some work also


Some grinding ,some filling looks a lot better.


Tommorow I think I will start fitting the inner wheel tubs , will try to get some better pics of that..as well I will get some better pics of the passenger side fitment before I start hacking it up in case someone wants to see what they are up against with this fitting combo
 
Discussion starter · #32 ·
Hey guys , I have been slacking on both the car and my posting , been enjoying the summer camping fishing etc etc , but I managed to get a few things done.

Finished the passenger fender , here is a pic of before and the clearance issues. Fender sits right on the tire , and you can also see the center bulge of the fender come out way too much


Here is where I will make the first cut


Once I kinda got the arch tacked in place , I had to cut here also , scribe a line and cut it


Here is where I will cut the lip off , the remainder up to the crease will get folded back to give it some strength


Here is where I screwed up and got way to stretch happy... now I have a big hole to fill


The whole process messes up the body line , so I had to flatten out the old one and hammer dolly in a new one


Shot of it almost welded up , FYI I more of a grinder than a welder


This is what I have to fix now , the wheel tub to fender fit ,here is the back


And the front


What I have so far is strips welded to the bottom front and back of fender about 8 inches long , with 2 holes each for bolting the fender to the wheel tub


Will still need to do more mods on the wheel tubs , need some kinda of splash guard/filler but summer is running out and I want this thing in paint before winter sets in.
 
Discussion starter · #33 ·
So to get up to date , I got the outside in first coat of primer with the except for the hood and a couple small parts , I gave it a good soap and water wash inside and out , let it dry for a few hours with fans and epoxied the inside floor and trunk area.

The hood is curved wrong , google show this is a common issue on the aftermarket Camaro hoods , apparently also an issue on the firebird.

Front bumper needed some tweaks. I am not a fan of the 67/68 front bumper on the firebirds , My plan is to tighten it up to the fenders , paint it body color and leave the fillers out.

Also I used the 1/2 height DSE mount kit . PITA to lower the brackets on this thing

Here is a attempt to do a comparsion shot of the front tire..


I blocked the SPI Epoxy with 100 before primer. This stuff blocks out super , I think its a bit harder than the 2k , 100 leaves a very fine scratch


Some odds and ends getting epoxy


As per SPI , I roughed up the bumpers and coated with epoxy. It was a little weird scratching up a brand new bumper. Also welded up the jack slots


I was having a hard time getting the bottom of the bumper turned in enough , it would hit the fender on the bottom corner and looked twisted if I pulled it out to clear.....


After Scouring the internet for pics, I came to the conclusion the repo bumper was a little goofy around the bottom , it was a little to wide so I trimmed some off the bottom


Much Better


The hood has a few little problems , the front contour doesn't match the bumper , and the afor mention arc


Front part was just a little cut and weld to fix , The hood has two options

A - Drill the spotwelds and lower the outer sheetmetal to the framing
b - Jump on it

Not sure yet what to do

Here is the front roughed in


ALSO -- Fyi , most searches show you cant use the LQ4 Brackets due to hood clearance issues , maybe the Camaro is lower , or its my engine mounting set up that's different , but I got a ton of clearance. I know its not the prettiest arrangement for accessories , but I can live with it


Discussion starter · #34 ·
Have been doing lots of block sanding , I think its ready to hit with 400 now.

Heres the steps I took

epoxy prime , block with 100
used usc icing on any bad lows , bonk down the highs with a rubber mallet
2 coats of SPI 2k primer
I used a black guidecoat , however I have a black substrate of epoxy under the primer ,so it was very difficult to tell the lows from the highs
Block with 240 , icing and mallet again
spi epoxy in minor low spots/bare steel
block the spots of epoxy with 240
2 more coats spi 2k
red guidecoat this time
block with 240,its pretty much flat now
thin coat of reduced 10% spi 2k


I did do some minor damage to the hood in the process of bending to match the fenders. I put a piece of 2x4 on the firewall and one on the radsupport, then a long piece of 1x4 on the hood and jumped up and down on it to take some of the curve out


Here it sits , now I am going to guidecoat and strip the car again , I plan on doing the final blocksand and painting in pieces.

 
Discussion starter · #36 ·
I got some paint on last night !!! I was fretting about a couple things , one was trying to paint the hood/doors painted outside and in all in one shot , seemed like a good way to mess something up without the proper stands like the pros have , second was working on the panel backside and putting some little dents on the outside from the weight and working on them , having the finished sides on workstands and all.

So I decided to paint the backs first , then block the exterior primer , mask it off and just have to worry about painting one side.

Learned something important , I recall reading about this somewhere...

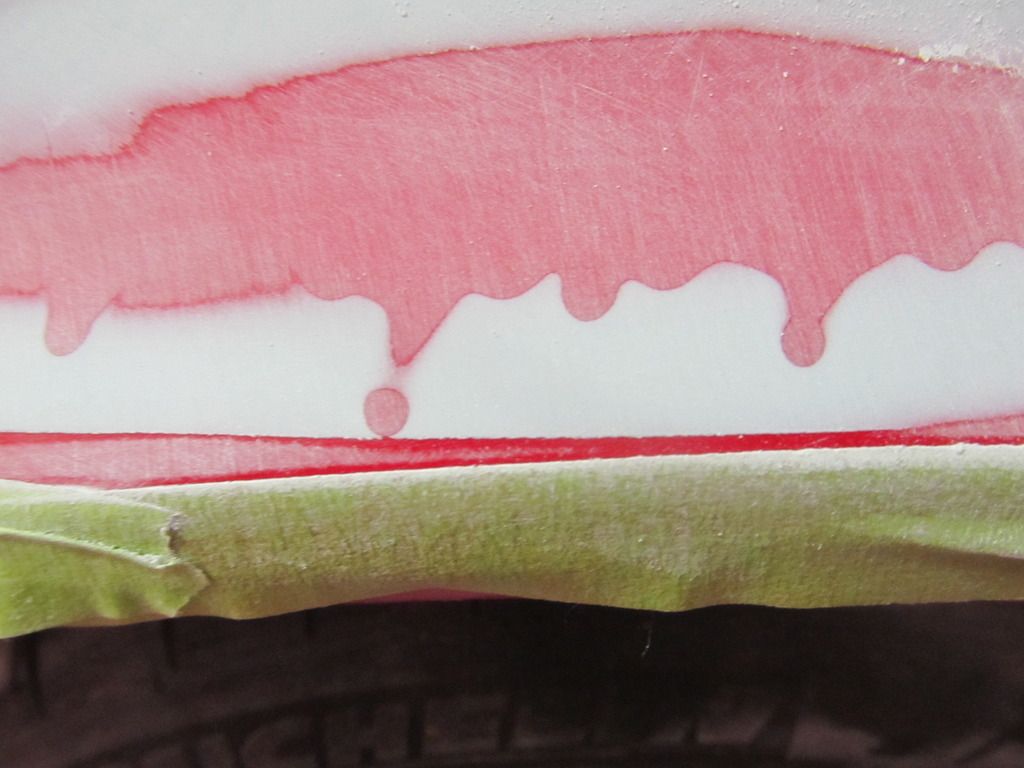
GREEN MASKING TAPE SUCKS!!!! For this kinda stuff anyway

I got some old school 3m white masking tape , and life got a whole bunch easier.

I considered this a practice run , I only painted 1 car before back in my teens , so these areas I don't consider them to have to be perfect , so I can get at least some type of process going for the outer panels.

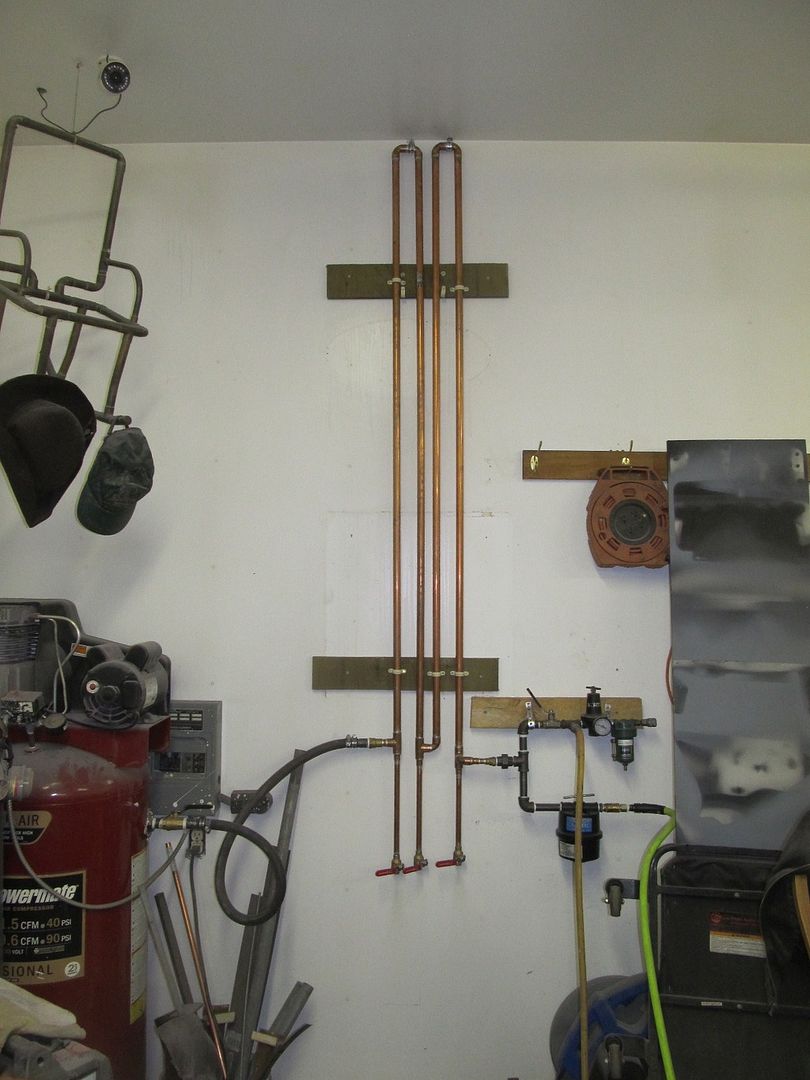
I built a new air drying setup , and upgraded my hose to 1/2 ". Piping is 3/4 from the compressor to the filters , then 1/2 to the gun.


I masked of all the holes in the dash and doors , PITA , but I got very little dust dust ,none on the dash at all , a cple specks on the doors, no booth or nothing.

Then sprayed with reduced epoxy as a sealer


Had a hell of a time getting it to flow good , tried a 1.3 tip at 25 psi , that did not work , went to a 1.5 @ 30 psi and that solved the problems.

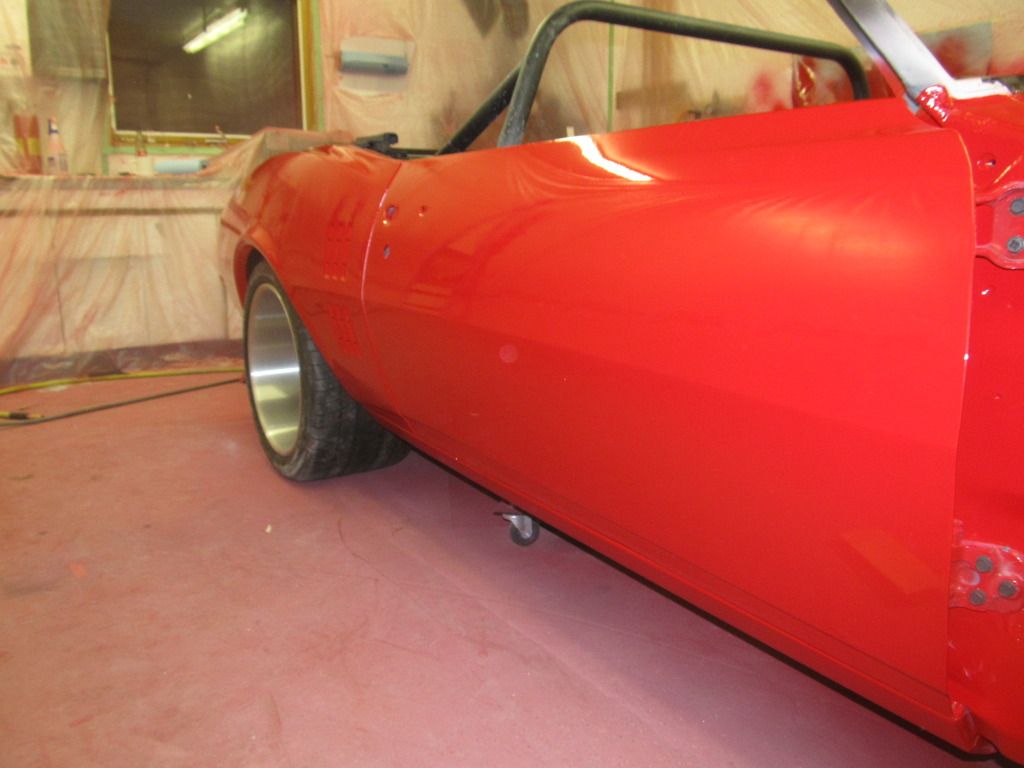
Used the same tip for the paint , flowed out awesome , I kept it just on the edge of being a run and it was cool , you could see the whole surface flow together like magic.(top of the dash will be matte black)


[/URL

[URL=http://s1376.photobucket.com/user/Craig_W_Stevens/media/Paint_round1/IMG_1663_zpsblvikfeq.jpg.html]
]

So now the plan is to get everything final blocked , clean the heck out of the garage and car , and turn the one side into a mini-paint booth.

I am using SPI Single stage red , am planning on three coats of that , wait overnight , then 3 coats of universal clear , which should give me enough material to learn how to wetsand/polish over the winter.
 
Discussion starter · #38 ·
Thanks , I am not sure its ever going to be done ... I made some new plans for this winter, living in the far north of Canada there is only 2 things to do in winter(well,3 lol) , riding snowmobiles or working in the garage. My body is almost 50 but my brain is still 25 , so riding stupid fast 100+ mph snowmobiles just hurts to much ,so.

Once its all painted , the front clip is going in the 5th wheel for the winter , am going to pull the subframe back out , put a stoker kit in the 6.0 , paint all the ridetech stuff red to match the body , install a terminator EFI system , I really want a fab9 rearend cause they look badass,detail the subframe , the list goes on and on.

Done seems sooooo far away
 
Just wanted to say wow. I love these build threads. Awesome man. Keep up the good work
 
Discussion starter · #40 ·
Happy Saturday guys , its turkey long weekend in Canada , so should be a great weekend for the my bird.

I have been having a hard time with the clearcoat, but worked out for the best anyway. The original plan was to shoot three coats of spi ss red , then three coats of clear , let it sit for a few months till the sun comes out again up here , then give it some rays ,wetsand and block.(hopefully having the the mechanincal and stuff done in between).

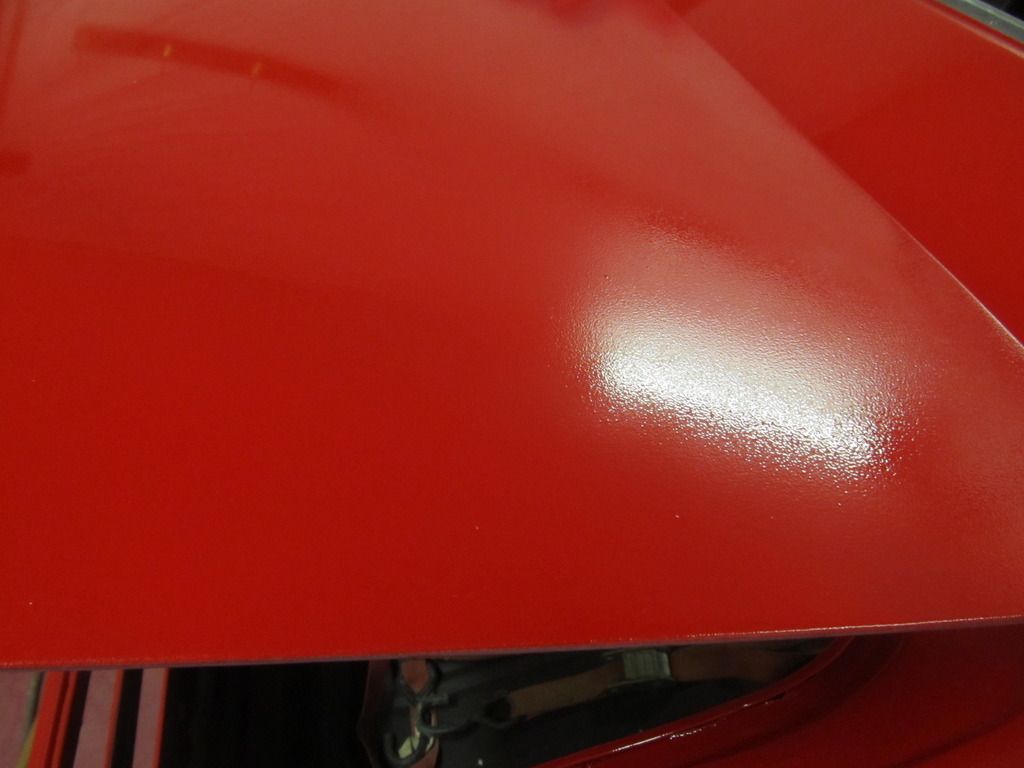
The single stage went on great , no runs , a little orange peel that the clear would cover easy .

The clear ..... bah I totally blew that , I have never sprayed clear before so I used way to much spray , tried to compensate with speed and backing the gun away , but it dosnt don't flow out like single stage does , what u see behind your gun is pretty much what you get.

I got it all , runs , texture that looked like gravel guard , solvent pop , orange peel.

I Think I would have had enough material on there to wait a few months ,wet sand it out and shine it up and it would have been fine. However , It made me quite sad to look at it , plus buddies coming over for a beer to check it out would have been embarrassing.

As it turns out , a lot of guys using the SPI clear are putting on 3 coats , sanding it flat,then putting a cple more coats ,then doing the cut and buff.So that is my new plan.

Anyhow , heres some pics from the last couple weeks.

I painted the dash top satin black , bedlined the roll bar ,wheel tubs and inside trunk


Reduced epoxy , ready for some color


Oh , the horror ... Here is some texture , looks like clear bedliner


poor shine on most of it here


facepalm....soooo bad


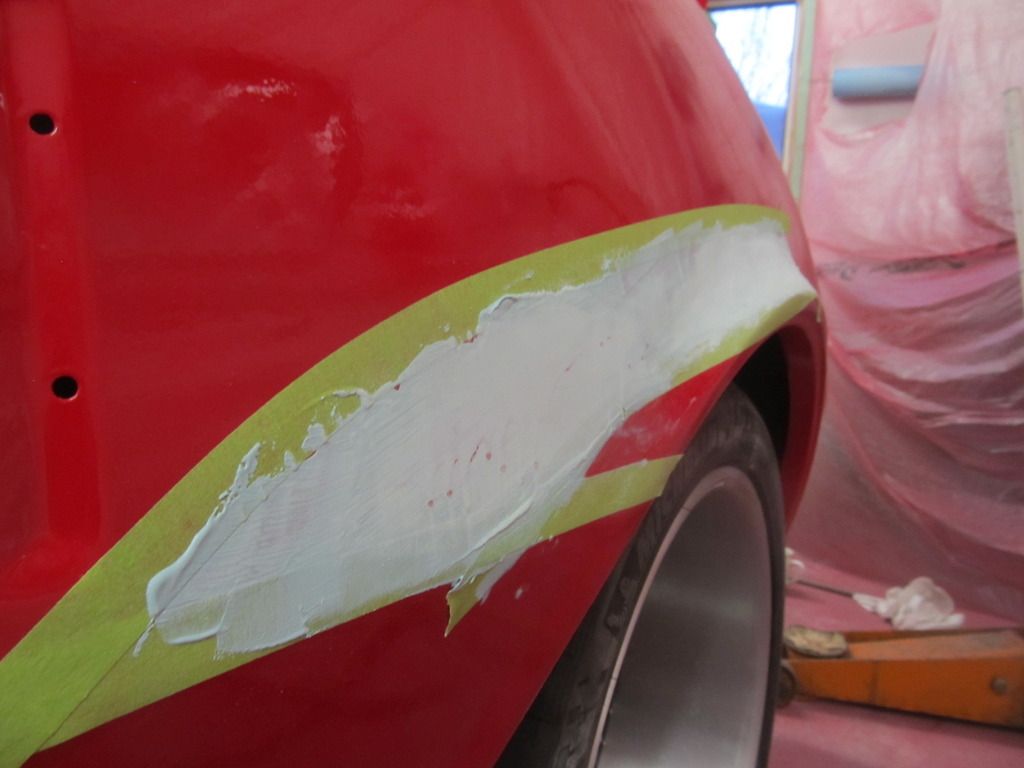
A nice run... Not the end of the world though , I found a cool way to fix these


Taped it off for a little safety


I Didn't understand this it all when I first watched it on youtube , but yeah , you put 2 part poly putty over the run


And start sanding down the putty . I used 240 dry until I knocked most of it down , then finished with 400. The putty protects the surrounding paint as it goes down


its pretty much foolproof , ready for clear now.


Here is a lil solvent pop I think , its just a little crater in the clear. I could have sanded it out , but I would have had to take the clear right down , so I mixed a little clear and dapped it the holes , just knock it down before the next coats.


Doors ready for a respray


I tried the trunk lid by itself. I blocked it with 400 , SPI says you even go as low as 320 , it didn't look to me like it would ever be shiny again , so I thought I would try this in baby steps. I got some better lighting , switched my tip to a 1.3 , actually set the gun a little better now that I know how this stuff goes on.

Came out MUCH better,clear took too 400 scratches no problem at all. I don't think I would want to wet sand till the clear hardens as it might shrink into them , we will see how it goes come july , but I can at least go out to the garage without getting depressed now(once I get the quarters and doors done)


So , hiho,hiho,its off to paint I go..
 
21 - 40 of 65 Posts